Adding Google Analytics to WordPress blog (for newbie without coding knowledge)
")
You are a newbie website, blog builder. And you are looking for a way to add Google Analytics to your WordPress blog without coding knowledge ? In this article we will let you know why Google Analytics is necessary and how to install it in your blog.
Most people who have a website or blog they are using Google Analytics services because you want to know how your visitors or customers interact with their website, blog. With Google Analytics (GA) that provides statistics and analysis audience behavior, activity for search engine optimization and marketing purposes also. Google Analytics gives you fresh insights into how visitors use your site that’s what Google said.
Why we do?
When you start a blog, you want to get more visitor or boost traffic to your blog for sure. To do this, you need to have the analysis help you know what you need to do. And Google Analytics can help you do that better.
There are many benefits when adding Google Analytics (GA) to your blog:
- Firstly, it’s free when using Google Analytics. This is really great for a website analytics tools.
- With GA you know who visit your blog, even you know their geographical location, browser, operating system, language and more…This analysis is very useful because it helps you know what they are doing and where your audiences are going on your blog.
- You can also track bounce rate, external links…and how long do they stay on your blog.
- You may know how do your audiences find your blog: search engines (Google, Bing…), social network (Facebook, Twitter, Instagram, Linkedin…), backlinks…This information help you track where did they come from.
- It’s easy to connect with your Google Webmaster Tools or Google Adwords.
- With GA reports, you will have events, file download tracking, logins, registrations tracking…
- Powerful features of GA : real time reporting, site speed tracking, acquisition and conversions reports (with top referrals, top active pages, top social traffic, top keywords data…)
- …
Summary, by seeing visitors activity on Google Analytics you will know what do audiences interact with your blog, what your audiences are searching for. Thus, you can focus on the strategies that increase your pageviews or traffic of your blog.
What we need?
Before you add Google Analytics to your blog, here is what you need:
- A Google account (Gmail email address or YouTube account): you can easily sign up GA by visiting Google Analytics Sign Up page and fill your information there (Google account, your website url…). When you’ve finished that, you will have a Google Analytics account that already linked your web site to Google Search Console. You can check and edit it if needed.
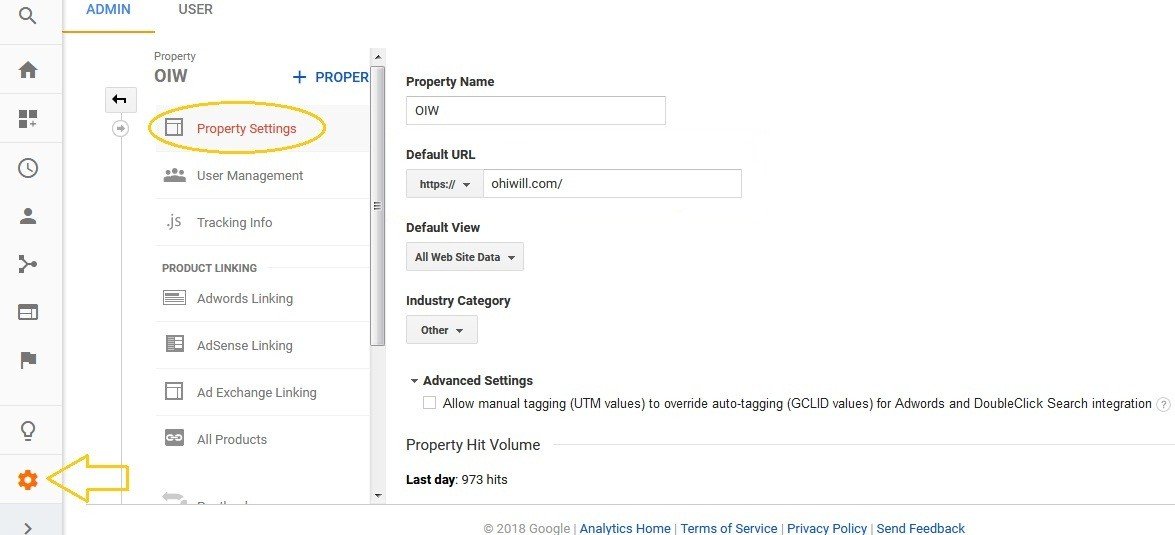
- You need to copy tracking code from your Google Analytics. To do this, you need to log in to your Google Analytics account (you have already created it by following these steps above). Then click on Admin section on the left side. On the Property (middle column), click on Tracking Info then Tracking Code section. You will see Tracking Code (this script under Global Site Tag section) there (copy it for later use). See screenshot below:
![]()
How to add Google Analytics to your blog?
I will show you three simple ways to add Google Analytics in your WordPress blog (just copy/paste job).
1. Adding Google Analytics by using WordPress plugin
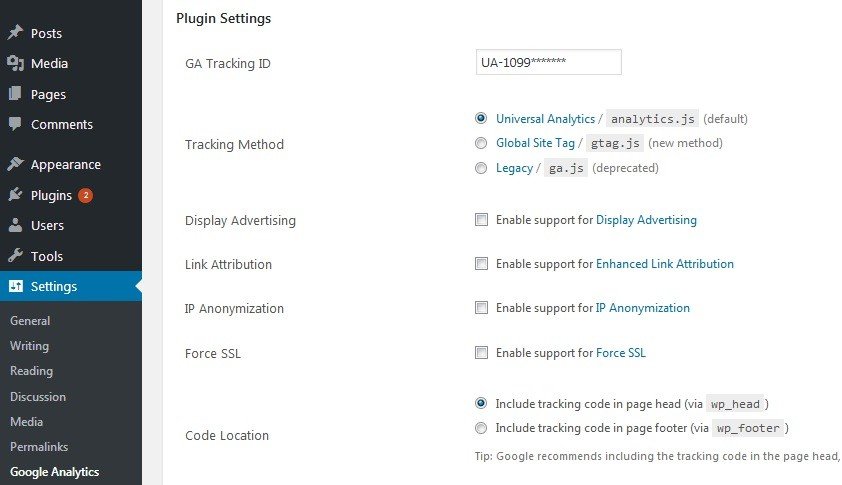
The easiest way to install Google Analytics to your WordPress blog that’s installing a WordPress plugin. I highly recommend install Google Analytics for WordPress by MonsterInsights or GA Google Analytics plugin. Basically, both plugins help you add Google Analytics to your WordPress blog. If you want it to be simple and clean, then you can use GA Google Analytics (see screenshot below to have a better look with this plugin).
And you want to have more features, great UI design, then you can install GA for WordPress by MonsterInsights (with this plugin, you will have Google Analytics dashboard for real time stats, tracking of universal, ecommerce , ads , file, referrals, performance… ). You can read plugin description, installation and reviews for more details and choosing the one that you think it’s the best suits.
2. Adding Google Analytics Tracking Code to the header.php file
To do this, you need to log in to your WordPress dashboard then navigate to Appearance on the left side, click on Editor. On the right-hand site below Theme Files, click the header.php file (see screenshot below)
![]()
Then paste your GA Tracking Code before the closing </head> tag (this place recommended by Google). To save and upload it then you need to click Update File button. You’re done.
3. Adding Tracking Code via theme’s functions.php file
You will need to open functions.php file of your theme (by using File Manager on Cpanel or via FTP). This file is locate in : /wp-content/themes/your-theme/. Then you put this snippet into it (replace UA-xxxxxxxxx-y with your GA code):
<?php
add_action('wp_head', 'oiw_add_googleanalytics');
function oiw_add_googleanalytics() {
?>
<!-- Your GA Tracking Code begin here -->

<!-- Global site tag (gtag.js) - Google Analytics -->
<script async src="https://www.googletagmanager.com/gtag/js?id=UA-xxxxxxxxx-y"></script>
<script>
window.dataLayer = window.dataLayer || [];
function gtag(){dataLayer.push(arguments);}
gtag('js', new Date());

gtag('config', 'UA-xxxxxxxxx-y');
</script>

<!-- Your GA Tracking Code ends here -->
<?php
}
?>
P/s: You can also open this file from WordPress dashboard (Navigate to Appearance -> Editor then click the functions.php file on the right-hand site below Theme Files). Then you can put the above snippet into it. Finally, click on Update File button to update it.
Checking Google Analytics Reports
Do follow these ways above you have already installed Google Analytics to your blog. You need to wait for Google Analytics to start collecting, reporting data (up to two hours or more, 24 hours max). Then, you can check this by logging in to your Google Analytics account. You will see the reports in the left side with multiple tabs (Real-Time, Audience, Acquisition, Behavior, Conversions…). And each tab will have more options when clicking on it.
I hope this post will help you know how to add Google Analytics to your blog. If you’re following these ways here but they didn’t work for you, you can let me know in the comments section below. Or feel free to ping me by using contact page.
Thanks for reading !
")


2 Comments
Joe
I own a website, will this work, to does it require another procedure?
Admin
Joe,
You can do following these steps in this article that’s all. Please reply this comment if you need some helps.